

Welcome to the world of four and five-year-olds! The children in your class know foundational social skills and they are ready to move into more complex, knowledge driven exploration!
As a teacher, how are you supposed to encourage this mindset, yet at the same time teach these young investigators how to cooperate in group and independent play?
I know that you have heard the word "play" before. Play is the foundation for learning in every age! Simple, hands-on experiences teach language, social and academic skills, and it is simpler then you may think to incorporate this into a four and five year old room.
Here are 7 simple ways to support your classroom and your children's development:
1) Create a space that is safe, free-flowing and organized.
Sounds easy right? Your positioning of classroom materials, furniture and choice of decor will directly impact the behavior of your group.
Create a variety of spaces within the classroom that have their own purpose. Use furniture, carpets, small tables and rugs to define each space.
Examples of areas:
- Art Area
- Block Area
- Library
- Quiet Corners/Calming Area
- Animals/Living things/Science Area
- Dramatic Play Area
- Sensory Area
- Group Time/Large Motor Game Area
Be mindful of colors and materials that you use. Bright and flashy colors tend to bring out energy (and sometimes chaos). Instead, use earthy tones (greens, blues, browns, etc). This will create a calmer classroom energy.
When decorating walls, it is okay to have some empty space! Think about your home. Do you have the entire wall covered with pictures, photos, posters, etc? Probably not! Think in this same way for your classroom. Too much to look at and too many items on the walls can create too much stimulation for young children, resulting in misbehavior.
2) Don't have too many materials out.
Too many materials mean chaos! Consider only placing four or five toys in each area of your classroom. Rotate them out every week so there are new items (this will spark excitement and focus).
When you place a material out, put it on a shelf or in a bucket that is not shared. This creates clear and concise boundaries for these materials - easily definable when it is time to put them away. Take a photo of that item/material and tape it to the shelf or bucket it belongs in. For children, both visual and auditory cues are a must.
Example #1:
In the art area (always have an easel area readily available) -
Week 1: Crayons, washable paint, yarn and buttons and glue.
Week 2: Markers, watercolor paint, sponges (for painting) and glitter.
Week 3: Markers, empty boxes, child-safe scissors, glitter and glue.
Week 4: Scrap paper from the month, tape, colored pencils.
Then rotate again!
Example #2:
In the block area -
Week 1: Tape measure, wooden blocks, maps of local areas, photos of community buildings.
Week 2: Legos (large and small), plastic animals, cars, plastic people.
Week 3: Tape measure, wooden blocks, photos of building blueprints (spaceship, buildings, cars, wonders of the world), pencil/pens with clipboards.
Week 4: Recycled materials (empty boxes, paper towel rolls, tissue boxes), cars, plastic people/dinosaurs, paper and crayons.
Then rotate again!
Here is a link to the ITERS (Infant/Toddler Environmental Rating Scale) and ECERS (Early Childhood Environmental Rating Scale). Keep these guidelines in mind when setting up your classroom.
3) Prepare Activities that require minimal adult-direction.
When you create your plan for the day, make sure that you have activities the children can do on their own, with you there for support.
Instead of "cutesy little crafts" that require long attention spans, self-direction and, let's face it - too much supervision, plan some activities that spark creativity, imagination and social/language development.
If you are going to have formal "center time activities" for four and five year olds, provide materials that have open-ended "products", focusing on the process instead. Asking children open-ended questions encourages them to elaborate on what they are doing and take their learning to the next level. Here are examples of open ended questions.
Center examples:
Table 1 (following directions): Ask the children what they want to teach their fellow classmates how to do. Write down what each child says. Every day, allow one child to teach the rest of the children what they came up with. This helps children build leadership skills along with communication and cooperation! Some examples of activities the children in my class taught each other was:
- How to draw a butterfly
- How to make lemonade
- All about Trucks.
- How tadpoles turn into frogs.
- How to spell the name of their dog.
Children come up with all sorts of ideas on what they would like to teach their friends. Ask them and you will have curriculum activities for a month!
Table 2 (Sensory and Creativity): Develop a sensory bin filled with items that correlate with the topic that you are learning about.
Examples include:
- Jungle - Dirt, plastic animals
- Construction - Rocks and plastic trucks and tractors.
- Fish - Water, plastic fish and empty fish food containers.
- Family - Baby dolls, water, soap for bubbles, sponges.
- Cars - Car wash (cloths), water, plastic cars, soap.
- Cooking - Oatmeal, Plastic dishes, measuring spoons, measuring cups
Center 3 (Project): Projects are fabulous ways to encourage children to dig deeper into a topic. Projects can last over multiple days, even multiple weeks. In the large motor/block area, a project can be worked on as a group.
For example, once - my class became interested in restaurants.
- We had a themed restaurant room in dramatic play area.
- We created play money (and learned numbers).
- We created menus (breakfast, lunch, dinner and snack) and priced the food out.
- We created roles for each child (cook, waitress, cashier, hostess, guests).
- We created tables out of empty boxes. Children added play cups, spoons and forks.
- We used chalkboards to create "drive through" menus.
We have some wonderful projects in our Level 3 Pre-K YOUR Way Curriculum. These have have been incorporated into many local classrooms as small and large group activities! Check out the details here!
Some Early Childhood Teachers and Homeschooling families have requested a sample daily schedule to plan out activities. I have created a plan for you. Feel free to modify it as necessary to fit the the unique needs to the children you are teaching. You can find this plan HERE.
4) Change the focus of your circle time.
Circle time isn't just about telling time, the weather, learning the calendar and such. Actually these topics are very advanced for most preschoolers, as they are abstract concepts.
Time, to a child, is what is happening next in their daily schedule - not what number corresponds to how light it is outside.
Circle time is about sharing, connecting and learning new and interesting things! When you are working on a classroom theme, use circle time to ask children what they want to learn about a certain topic. Use their answers to guide your learning activity choices, each day discussing, researching and finding answers to those questions.
A successful circle routine:
- Welcome Song (that involves movement)
- Project - Find out what your children are interested in. If you have white board, write the theme topic in the middle. Ask the children what they want to learn about it and draw a line to each of those questions (their responses). Spend each day discovering the answer to one of the questions in an engaging, hands on way. For example: Post office-
- What is a stamp?
- Who are the people that work at the Post Office?
- How many different sized packages are there?
- What does the inside of a Mail Truck look like?
- Where is the closest post office?
- Can packages be delivered by land/air/sea? How?
- How do you address an envelop?
- What do you put in the mail?
- If you were to write a letter, who would you write it to? How would you spell their name?
3. Short story! One that engages the children is best. Yoga ones have been so popular! Here is a link to some great ones!
4. Job chart - Write each child's name on a Popsicle stick or piece of large paper that can be reused. While the children are sitting down, tell them that when you call their name, they are to get up, place their name on the photo of the job they would like to do that day - then line up or move on to the next activity have planned. It is okay if multiple children want to do the same job. This age is about teaching partnership, social skills and taking turns - so what better way to do that then to share a job with a friend.
Examples of preschool-approved jobs:
- Fish feeder
- Clean up helper
- Water plants/gardner
- Light helper (turn lights off)
- Greeter (greets all the children as they transition)
- Class counter (counts how many children are in the class as you move to transition)
- Lunch helper (helps get lunches on the table)
5) Schedule larger blocks of time for indoor and outdoor activities.
Create a day filled with large chunks of time. As you know, children aren't too fond of transitions! Leaving ample time to explore provides opportunities for building friendships, encourages imagination and supports creativity.
Recent studies state that children should spend at least 45 minutes in each free-play setting. But how are you supposed to get everything done and let them play for that long?
Here is an example of a morning schedule:
8:00 am - arrival/open play
8:45 am - greeting/morning circle
9:00 am - indoor free-play and centers/projects
9:45am - clean up time
9:55 am - wash hands/bathroom
10:15 am - snack time
10:40 am - outside time/outdoor projects
11:45 am - clean up time and transition song
12:00 pm - bathroom/wash hands
12:15 pm - lunch
12:40 pm - nap time
5) Create a calming space that provides hands-on and simple ways to support their emotional development.
If we teach children simple and effective coping strategies while they are young, they will be able to utilize those skills and strategies through their teenage and adult years.
Have you ever wondered why young children get so upset, acting out in a meltdown or tantrum?
You are not alone! According to Robert Plutchick, professor emeritus at the Albert Einstein College of Medicine, more than 90 different emotions have been identified!
Unfortunately, humans aren’t born knowing how to process their emotions or problem solve. Throughout your life, you learned what techniques help you calm down.
The same goes for children in a classroom. They are unsure how to manage and/or handle these emotions. There is a lot of expectations throughout the day (listen, share space, take turns, wait, stop, let's do this instead... etc).
Using a hands-on and simple sensory-supports will help children learn self-soothing methods and how to manage their own emotions.
We created a Soothing Sammy Kit for parents and preschool teachers.The children's book, along with Sammy the plush dog and parent/teacher guide, creates a complementary set of tools that every home (or classroom) with young children will appreciate.
1.The "Soothing Sammy" children's story teaches different calm down strategies. In the book, children visit Sammy, at his dog house looking for help when they feel upset. Sammy teaches them how to calm down, identify why they were mad and encourage them to create a solution. Your child will learn:
- How to process emotions.
- How to communicate feelings.
- How to problem-solve.
- How to use their sensory system to calm down.
2. Sammy the Plush dog - Learn how to construct a "Sammy house" for Sammy, the plush toy dog (included) to live in. Sammy's house incorporates common household items talked about in the "Soothing Sammy" book. These items help children calm down when they are upset. This house helps children and families implement the calming strategies learned in the Sammy book. .
3. The activity guide discusses a variety of ways which you can incorporate Sammy's lessons into your everyday life, including:
- Sharing space and items with other children.
- Encouraging your child to listen.
- Helping your child express their feelings.
- Preventing your child from becoming frustrated.
- Transitioning to and from different activities.
- Following Directions.
4. Sammy Songs and Curriculum

Here is more information on Soothing Sammy!
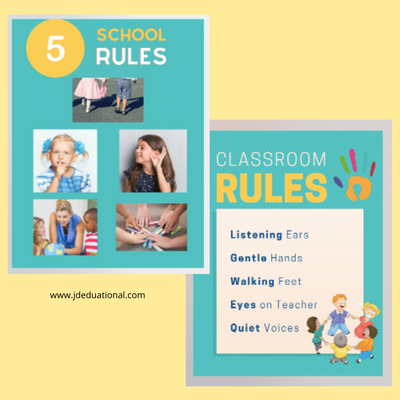
6) Have the classroom rules displayed in a way that is easy to understand and simple for children to refer to.
A daily schedule is a must! For children of this age, a visual schedule will go a long way! Take a picture of the children in your class completing each portion of your day and place the photos in order (within your daily schedule).
As children ask when mommy is coming - you can point to the picture that resembles that time. Point to the photos before and say "mommy will come after circle, snack and outside time"!
This will also help children understand what transition is coming next. They don't necessarily want to clean up, but if they know that snack or outside time is coming next - maybe they will change their mind!
Remember - children do best with auditory and visual cues when they are transitioning. Before each transition, give a five and two minute warning and use a clean up song on the CD or sing a clean up song when you are cleaning up!
7) Make sure their tummy's are full and they have plenty of rest time.
Make sure that you have bathroom time, snack time and rest time available throughout the day. :) Meetings children's basic needs is the foundation to happy and pleasant behavior.
There you have it! The secret to a successful 4's and 5's classroom! Don't forget to include every parent in this journey. Consistency between home and school is a must. Send home a few photos of each child during the week. Write down some silly things they say and encourage parents to read a story with their child before they leave. Children will feel like their parent is just as excited to be at school and part of their day, even when they aren't there.
 Was this interesting to you? Sign up here to receive our new blogs as soon as we publish them!


Thank you this is very helpful